The End of Twitch PubSub

Finally Twitch EventSub is at feature parity with third party supported/documented PubSub, that the end of PubSub has been announced.

In a forum post over on Twitch Developers it has been announced the schedule for the shutdown of Twitch PubSub for access by third party developers.

The final death date is April 14th 2025.

Which I guess means it’s time for me to complete my own migration from PubSub to EventSub. Which at least is JUST ABOUT planned….

At least for 90% of what I need it’s ALL USERNOTICE as an EventSub topic, which is this case is channel.chat.notification and then whatever I choose to go with for consuming cheering.

So then for anything else I’ll need that doesn’t exist, either from it not existing in the first place OR a undocumented topic I might be using, off to uservoice I’ll go!

Off hand I think there is only one thing but we’ll see when I work on and complete my migration! The only other barrier is gonna be authentication but I have authentication or can get it for everything I need.

It is worth noting that Extension PubSub is unaffected, as that for the most part is a completely different system that just shares the same name.

Topic Migration notes

Edit: I guess I should add some notes about migration

PubSubEventSub
channel-bits-events-v1.<channel_id>channel.cheer or channel.chat.message
channel-bits-events-v2.<channel_id>channel.cheer or channel.chat.message
channel-bits-badge-unlocks.<channel_id>No Route, or inferred from channel.cheer
channel-points-channel-v1.<channel_id>channel.channel_points_custom_reward.add
channel-subscribe-events-v1.<channel_id>channel.chat.notification is what I will use for my use case of overlay/on stream alerts. Other type segregated topics exist
automod-queue.<moderator_id>.<channel_id>automod.message.hold
chat_moderator_actions.<user_id>.<channel_id>channel.moderate
low-trust-users.<channel_id>.<suspicious_user_id>automod.message.hold and automod.message.update
user-moderation-notifications.<current_user_id>.<channel_id>channel.chat.user_message_hold
whispers.<user_id>user.whisper.message

The Twitch Extensions Developer Rig is Dead

Or is it?

Preamble

Twitch decided to deprecate the Extension Developer Rig, which is fine, just about everything that the rig could do is avialable via the API now. You can read about the Deprecation on the Developer Forums.

The final thing that was API enabled was bits product management, which for a while was rig only, but is now available in the API and more recently in the developer console, so if you don’t want to write or use a tool, you can use the developer console instead.

You can read more about the Bits product management announcement over on the Twitch Developer Forums.

So What Now?

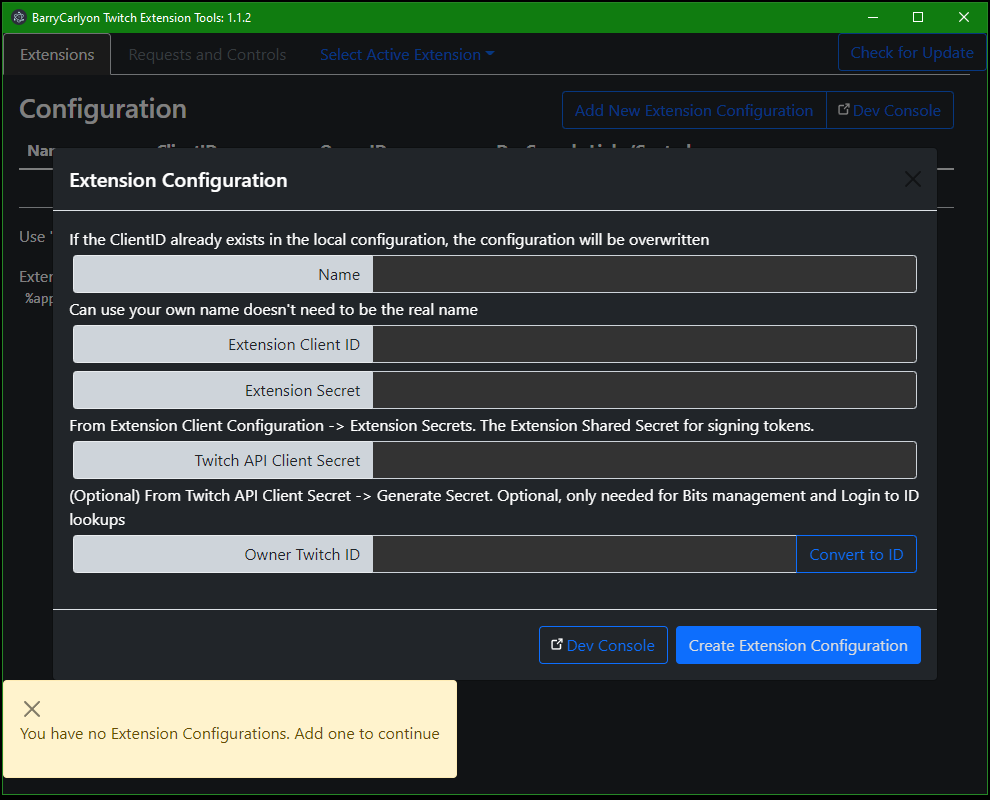
For those working with Twitch Extensions, you can either write you own tools to talk to various things via the API, such as the Config service or Bits product management or you can use a tool that someone else wrote such as my own Twitch Extension Tools. But that leaves out the one thing that the Rig can do but nothing else can, which is view testing.

View Testing

The optimal way, in my opinion, to do view testing is to get your Testing Base URI setup over SSL, either via using a real URL, or a reverse proxy tool such as NGROK.

But there are times where you don’t want to do that or just want to quickly test a video or component slot extension without going live, which is where the Rig comes in, you can test those sort of extensions without going live, or even by putting the “wrong” channel behind you extension (listen to Monstercat whilst working on your extension for example….)

The rig is still available for doing that sort of testing, but you may need to reimport/reopen a project or refresh the projects manifest into the rig, or you have started a new Extension and need to test.

That part of the rig is broken, you’ll hit the buttons and nothing will work as the API’s the Rig are trying to talk to just no longer work if they exist at all, to that end I devised a little tool to cover.

The Manifester

Presenting the Twitch DeveloperRig Manifester (not affiliated with Twitch naturally).

A Screenshot of the Manifester. It’s ok the userID is mine I can leak my ID all I want mom!

Which provides the following tools:

  • Import a Project, generate a new project file from an Extension and add it to the Developer Rig
  • Refresh Manifest, update an existing project file or change the active version,
  • Reopen Project, when you import an extension into the rig it generates a project file saving with it the views you made, you can then close the project in the rig, this file tool lets you reopen that project file and add it back to the rig.

Thats the three main things “broken” in the rig that can be replaced.

The other thing missing is “create a new extension and add it to the rig”, for that you need to use the developer console and then import to the rig via the Manifester.

Just remember to close the developer rig first before trying to use the manifester to do actions.

Notes

It’s a quick and simple Electron app licensed under WTFPL so go wild!

Summary

So, for helping with your Twitch Extension Development either:

  • write you own tools to interact with the API
  • use the Developer Console for bits product management
  • use a tool such my Twitch Extension Tools to talk to the various Extension related APIs
  • the Developer Rig Manifester to continue testing in the rig
  • test your extensions on the Twitch website with the testing base URI behind SSL (and don’t forget to have it in a subfolder to model hosted test and above best)
  • or any combination of the above

Twitch Extension Developer Tools

Around the time that Kraken was dying, I was doing something (I forget what, probably bits products), and found that the Twitch Developer Rig was totally hosed, since it was calling Kraken and hadn’t been patched. (It since has been but still being a little weird with some stuff with some of my Extensions, but I digress).

So I was like “screw it I’ll build my own tool with Blackjack and Hookers”.

So I went and built my own tool, it’s part “API testing tool” part “useful things for managing Extensions”. And released Open Source over on GitHub under the WTFPL aka – “Do What the F*ck you Want to Public License”.

Main reason for making a tool rather than a bunch of test scripts, was I wanted to easily store and recall my Extension Client ID’s Extension secrets, and easily generate App Access Tokens for the relevant API’s that needed.

So without further ado, you can find, download, use and abuse, the tool over on Github, or even PR a feature in https://github.com/barrycarlyon/twitch_extension_tools current Version is v1.1.3!

It should offer just about every “useful feature” from the Developer Rig, that there is a public API for, except for “Views” and “Start my servers for me”. For a easy summary of the Features Available, checkout the Readme on the GitHub!

DEATH TO KRAKEN

Todays the day!

Twitch’s Kraken API gets turned off in checks watch just over three hours!

I know I’m just about ready, but if you are not, and you already missed the shutdown test windows, heres some notes!

There is a v5 Migration guide – https://dev.twitch.tv/docs/api/migration

DO NOT FORGET this also effects the Extension API endpoints (such as Send PubSub message and Send Extension Chat message), this doesn’t affect the Extension JS Helper!

For most server to server operations you can use a Client Credentials Access Token

Most people will likely be using Ajax calls in website front ends and are now confused how to migrate, there are two routes for this problem. You either ask the user to login with Twitch to provide a token to use (this is how my GitHub examples work) but not very user friendly, you don’t want to prompt the user to login to your website JUST to show them if your stream is live or not. The second route is your frontend needs to call your server and the server uses a Client Credentials token to call the API with.

Alternatively if you are doing something “simple” such as “check my stream is live” then you should consider moving from API calls to EventSub instead. Then when a channel changes Title or stream status, Twitch will tell you in (near) real time. Collect and store that data in a database, and now your website doesn’t need to call the Twitch API each time someone loads your website.

For further help migrating or to join us for the DEATH TO KRAKEN party (bring your own confetti) join us on the Twitch Dev Third Party Developers Discord you can find a link on the Twitch Dev Support Page

For reference here is the Dev Forums link with the shutdown window timings: https://discuss.dev.twitch.tv/t/legacy-twitch-api-v5-i-e-kraken-shutdown-reminder-february-28-2022/36589 the shutdown originally announced back in July.

If a feature is missing or theres something you need thats not in Helix, don’t forget to file a UserVoice. I know a lot of people need/want Clip Offsets so make your voice heard with UserVoices and votes on existing issues. See also my mega UserVoice sheet. And checkout the GitHub for known issues.

Twitch Extensions Part 6 – Dev Environment Updates – Content Security Policy!

In part 5 we wrote about a suitable testing platform for building your extensions on, essentially we create a static content server, that mimics the Twitch CDN for testing with.

Twitch Announced on the Forums that they are revising the CSP (Content Security Policy) that extensions use to protect and control what can be loaded. I wrote about this in the previous blog post.

I’m currently waiting on a response from Twitch (via the forums) about any other changes to the CSP, but for now, you can test the changes today!

What Even is CSP

First lets do a quick explanation of what CSP, CSP is Content Security Policy, a browser technology to help control what a given Website can load and what browser functions are allowed.

The HTTP Content-Security-Policy response header allows web site administrators to control resources the user agent is allowed to load for a given page. With a few exceptions, policies mostly involve specifying server origins and script endpoints. This helps guard against cross-site scripting attacks (Cross-site_scripting).

https://developer.mozilla.org/en-US/docs/Web/HTTP/Headers/Content-Security-Policy

You can read more about CSP and the various things it can do over on the MDN Web Docs. There is a lot more that can and can’t be done with CSP more than just controlling what content can be loaded from where, but for Twitch Extensions we only need to consider the parts of the Policy that affect Twitch Extensions.

Twitch Extension CSP Policy

Twitch is requiring Extension developer to declare the Connect, Img, and Media domains, which in the policy are connect-src, img-src and media-src. You can declare this in the Developer Console for a version of your extension, under the Capabilities tab.

The New Extension Dashboard fields
The new Extension Dashboard fields

Now, the items you enter here only apply when you are using Hosted Test (or release), since Hosted Test will use Twitch’s CDN, and thus Twitch’s Server which can load and use the relevant fields, but in localtesting (aka not the CDN) we need to set this up ourselves.

Local Testing a CSP

If you have been following this series, then you already have a Node/Express server that will run a static output for you. We can easily add CSP headers to this server using a module called Helmet, generally speaking it’s wise to consider adding helmet (or CSP Headers in general) to any website you run to protect your users, but I digress!

So, how to set this up for Testing with.

Normally I’d say, on server start call the API to get the current extension settings from the console, however, the API at this time has not been updated to include the new fields, I raised a UserVoice requesting the new fields be added to the endpoints. And you can upvote that here.

So for now, we’ll need to populate the CSP for Helmet manually.

Configuring Helmet for CSP

The first thing I did was look at a released extension to see what the current CSP is, which I then split out into a object for configuring Helmet with. Then I looked at what the rig needs, and then looked at what you need to add to correctly simulate a CSP.

The base CSP for a Twitch Extension is, here twitch.client_id is loaded from an external config file, and represents the location that Hosted Test and Release use to host your files. Which I’ll touch on later.

/*
Current base CSP rules subject to change

See:
https://discuss.dev.twitch.tv/t/new-extensions-policy-for-content-security-policy-csp-directives-and-timeline-for-enforcement/33695/2

This example is based off a live extension
*/

let contentSecurityPolicy = {
    directives: {
        defaultSrc: [
            "'self'",
            `https://${twitch.client_id}.ext-twitch.tv`
        ],
        connectSrc: [
            "'self'",
            `https://${twitch.client_id}.ext-twitch.tv`,
            'https://extension-files.twitch.tv',
            'https://www.google-analytics.com',
            'https://stats.g.doubleclick.net'
        ],
        fontSrc:    [
            "'self'",
            `https://${twitch.client_id}.ext-twitch.tv`,
            'https://fonts.googleapis.com',
            'https://fonts.gstatic.com'
        ],
        imgSrc:     [
            "'self'",
            'data:',
            'blob:'
        ],
        mediaSrc:   [
            "'self'",
            'data:',
            'blob:'
        ],
        scriptSrc:  [
            "'self'",
            `https://${twitch.client_id}.ext-twitch.tv`,
            'https://extension-files.twitch.tv',
            'https://www.google-analytics.com',
            'https://stats.g.doubleclick.net'
        ],
        styleSrc:   [
            "'self'",
            "'unsafe-inline'",
            `https://${twitch.client_id}.ext-twitch.tv`,
            'https://fonts.googleapis.com'
        ],

        frameAncestors: [
            'https://supervisor.ext-twitch.tv',
            'https://extension-files.twitch.tv',
            'https://*.twitch.tv',
            'https://*.twitch.tech',
            'https://localhost.twitch.tv:*',
            'https://localhost.twitch.tech:*',
            'http://localhost.rig.twitch.tv:*'
        ]
    }
}

const helmet = require('helmet');
/*
You can use Security Headers to test your server, if this server is web accessible
https://securityheaders.com/
It'll test that your CSP is valid.
Best testing done with an extension, on Twitch or in the rig!
*/

console.log('Going to use the following CSP', contentSecurityPolicy);

app.use(helmet({
    contentSecurityPolicy
}));

This I add after app.listen and before anything else! It does need to go before your app.use for express.static

This will configure your test server to use the base/default CSP. And will log it out the full CSP to the console when you start the server.

The Extension Developer Rig

So the next step is how to enable your test server to work in the Twitch Extension Developer Rig. I don’t often use the rig, but it’s handy for spot testing views and mobile when I don’t have my phone handy (or the Extension has not been iOS allow listed yet!)

The Extension Rig is built in Electron, which means it will include calls to file and in testing it spot calls some other things.

For the rig I add the following rules, which I append to the default CSP using a Config Switch.

/*
should we enable the Rig?

The rig being an electron app, will call some other things
As well as having a file:// based parent
*/
if (csp_options.enable_rig) {
    let rig_sources = {
        connectSrc: [
            'wss://pubsub-edge.twitch.tv'
        ],
        frameAncestors: [
            'http://localhost:*',
            'file://*',
            'filesystem:'
        ]
    }

    // append these to the CSP
    for (let sourceType in rig_sources) {
        for (let x=0;x<rig_sources[sourceType].length;x++) {
            contentSecurityPolicy.directives[sourceType].push(rig_sources[sourceType][x]);
        }
    }
}

Nothing to silly there, but important if you are testing in the rig. Only enable this in your server when rig testing not testing on the Twitch website, as it’s overly permissive and might catch you out later.

My Sources

The final thing to do is to setup your sources, now this gets a little weird, as a valid CSP rule can omit the schema of the URL (see note).

For this example/setup we are adding the content domains to all three CSP directives. Using this example you can adjust and modify this as granularly as you want.

/*
Did we configure places that we can/may load media from
And yes we are just gonna glob them to all three groups
For example purposes
*/
csp_options.content_domains.forEach(domain => {
    contentSecurityPolicy.directives.imgSrc.push(domain);
    contentSecurityPolicy.directives.mediaSrc.push(domain);
    contentSecurityPolicy.directives.connectSrc.push(domain);
});

Note: In testing browsers will not enable/allow WSS if you declare a schema-less domain of www.example.com. So if you want WSS you need to declare it explicitly, for this I declare wss://www.example.com and https://www.example.com in the rule (not the lack of a trailing /).

I configure these schema+domains in an external configuration file for the server. Here is an example config.json:

{
    "listen": 8050,

    "csp_options": {
        "enable_rig": true,
        "report_uri": false,
        "ebs_domain": "myebs.com",
        "content_domains": [
            "https://mywebsite.com",
            "wss://mywebsite.com"
        ]
    },

    "twitch": {
        "client_id": "abcdefg"
    }
}

EBS?

If your extension utilizes an EBS you’ll need to declare that and add it to your connect-src, however if you also load images from your EBS you can skip this step.

I generally put my images and assets on a seperate server to my EBS, but for test purposes, this server example adds the EBS domain to all three declarations, for both schemas:

/*
Did we configure an EBS to call
*/
if (csp_options.ebs_domain) {
    console.log('Appending EBS Domain');
    let ebs_rules = {
        imgSrc: [
            'https://' + csp_options.ebs_domain,
            'wss://' + csp_options.ebs_domain
        ],
        mediaSrc: [
            'https://' + csp_options.ebs_domain,
            'wss://' + csp_options.ebs_domain
        ],
        connectSrc: [
            'https://' + csp_options.ebs_domain,
            'wss://' + csp_options.ebs_domain
        ]
    }

    for (let sourceType in ebs_rules) {
        for (let x=0;x<ebs_rules[sourceType].length;x++) {
            contentSecurityPolicy.directives[sourceType].push(ebs_rules[sourceType][x]);
        }
    }
}

Full Example!

I put all of this together as a full example over on my GitHub. See Part 6 of the repository. This provides a “rig” as described in Part 5 but with the additional CSP Fields included.

To set this up do as follows

  • Download the Example from GitHub
  • Copy config_sample.json to config.json
  • Populate the twitch->client_id with your Extension Client ID
  • Revise the listen port if needed
  • Configure Your CSP options as needed, add the content domains as needed. And you EBS domain as needed.
  • If you load content from your EBS domain, set the ebs_domain to false, to avoid a duplicate declaration of a domain, or do not include your ebs_domain in your content_domains

Once you have setup the server, you can the test your Rig via Security Headers which will test that your CSP is valid, however this only works if your Test Server is accessible from the internet! Which if you follow Part 5’s note will be for SSL testing purposes! And will only test that your CSP looks correct, not that it functions as intended!

Then you can move on to testing your Extension and check that your CSP works as intended, then you do not have to move to hosted test and back to test changes to your CSP!

If/when the API is updated to return the new fields, I’ll add a part 6.5 (probably) which will use the API to get the details instead. Sods law you’ll add a domain to your Test Rig/Server, and then forget to add the same domain to your Capabilities tab!

DEADLINE

Twitch will begin to Enforce the new CSP policy on January 25th.

Twitch closes for the holidays between Friday, 12/17/21 – Monday, 1/3/22. Twitch requests that Developers submit their extensions for review no later than Wednesday, 15th of December at 3PM PST.

Upcoming Winter Break

Attention, developers! Please note that the review team will be observing a winter holiday break from Friday, 12/17/21 – Monday, 1/3/22 and will not be performing Organization, Game, Chatbot Verification, or Extension reviews during this period of time. If you need a review completed prior to the holiday break, please submit your review request by no later than Wednesday, 12/15 at 3PM PST. Thank you for your understanding & happy holidays!

From the Twitch Developers Console

ONE MORE THING: Report URI

Well what about the report_uri, that you saw in the config.json example?

Well CSP provides a method to report CSP errors to a defined HTTPS POST endpoint. So whenever a CSP error occurs it can be reported to that HTTPS URL, very handy to help debug issues.

So if you configure your report_uri to be the same URL as your Extension Test rig, but with /csp/ on the end, so if your rig is at https://mytestrig.com/ then your CSP Report URI is https://mytestrig.com/csp/

You can capture and log these reports, for Express you will need to use the following code snippet, please note that a JSON payload is posted but using an alternative content-type, so you need to tell express.json to trigger on that content-type of application/csp-report

/*
This will capture any CSP Report and dump log it to console
*/
app.post('/csp/', express.json({
    type: 'application/csp-report'
}), (req,res) => {
    console.log(req.body);

    res.send('Ok');
});

The report-uri documentation over on MDN includes a PHP example, if that is your cup of tea!

An Update! Easier Development!

Added a small update to this post for easier testing with, first I took the entire CSP component and seperated it into a NPM module for easier usage and configuration.

The module, `twitchextensioncsp` can be found over on NPM and on GitHub and essentially just wraps Helmet for you and passes in the CSP Configuration with much less copy/paste between extensions if you are working on multiples.

And the Example simple server (remove the “build” system) is at Part 6.5 on the GitHub Repository

For “ease” of use heres an “quick” static Express Server implementing the module, it will do the following:

  • Create an Express Server on port 8050
  • Invoke twitchextensioncsp
  • Enable the Extension CSP to support the Twitch Extensions Rig
  • Add Img and Media and connect example domains
  • Static mount the build directory onto extension so your testing base URI is http://localhost:8050/extension/ swap as needed depending on your SSL solution
const express = require('express');
const app = express();

app.listen(8050, function () {
    console.log('booted express on 8050');
});

const twitchextensioncsp = require('twitchextensioncsp');
app.use(twitchextensioncsp({
    clientID: 'abcdefg123456'
    enableRig: true,
    imgSrc: [
        'https://images.example.com'
    ],
    mediaSrc: [
        'https://videos.example.com'
    ],
    connectSrc: [
        'https://api.example.com'
    ]
}));

app.use('/extension/', express.static(__dirname + '/build/'));

If you refer to the README for twitchextensioncsp there are a handful of quick start examples for the CSP setup. As you do need to explicitly declare the Twitch CDN and Twitch API if you wish to use those in your Extension frontend!