Twitch Extensions: Part 4 – The One Rig to Rig them All?

This week on the Twitch Extensions Series, we are talking out the Developer Rig, what, when and how to use it!

What is the Developer Rig?

The Developer Rig is a downloadable tool, which is available on Windows, Mac and Linux provided by Twitch and found at https://dev.twitch.tv/docs/extensions/rig, which allows the Extension Developer to do a number of things.

A Typical Twitch Extension Developer Rig landing page.

If the Developer is new to building Twitch Extensions, it’ll also provide easy access to a number of Examples, which you can also find of the TwitchDev GitHub, but once you are into building your actual extension, you’ll be able to do the following things!

The typical tasks that Extension Rig provides Access to
  • Interact with the Config Service, if used for your extension, without having to write custom scripts
  • Manage your Bits Products, if your extension uses Bits, the only place to manage your Products and pricing is via the rig
  • View your Extension under a variety of views, and view configurations.

The rig also does some other useful bits and pieces that developer may have a use for, it provides the ability to start/stop both Frontend and EBS/Backend servers/services, that may be needed when local developing an extension. The paths and start commands can be saved with the project, which will save you time when starting Development for the day.

Especially useful for React/Vue and similar JavaScript frameworks you can “one click” start your Webpack server to serve your Extension for example.

The Extension Hello World hosting settings in the Rig

How to use the Developer Rig

The Monetization tab we will cover later when we talk about Bits in Extensions, and the same for the Configuration Service when we cover that!

So we’ll focus on the big thing the Developer Rig does for you.

First the most important thing that developer needs to be aware of when using the Developer Rig, is that whenever you change any settings for your Extension on the Developer Console you need to let the Rig know you did this, and you can do that on “Project Details” and click “Refresh Manifest”. The Project Details section of the Project also allows you to select which Version you are working on, so if you just released Version 0.0.1 and you started Working on Version 0.0.2, don’t forget to update the rig! Otherwise your test Extension Views will show the live and released version of the Extension instead of your in development version!

The Refresh Manifest button.

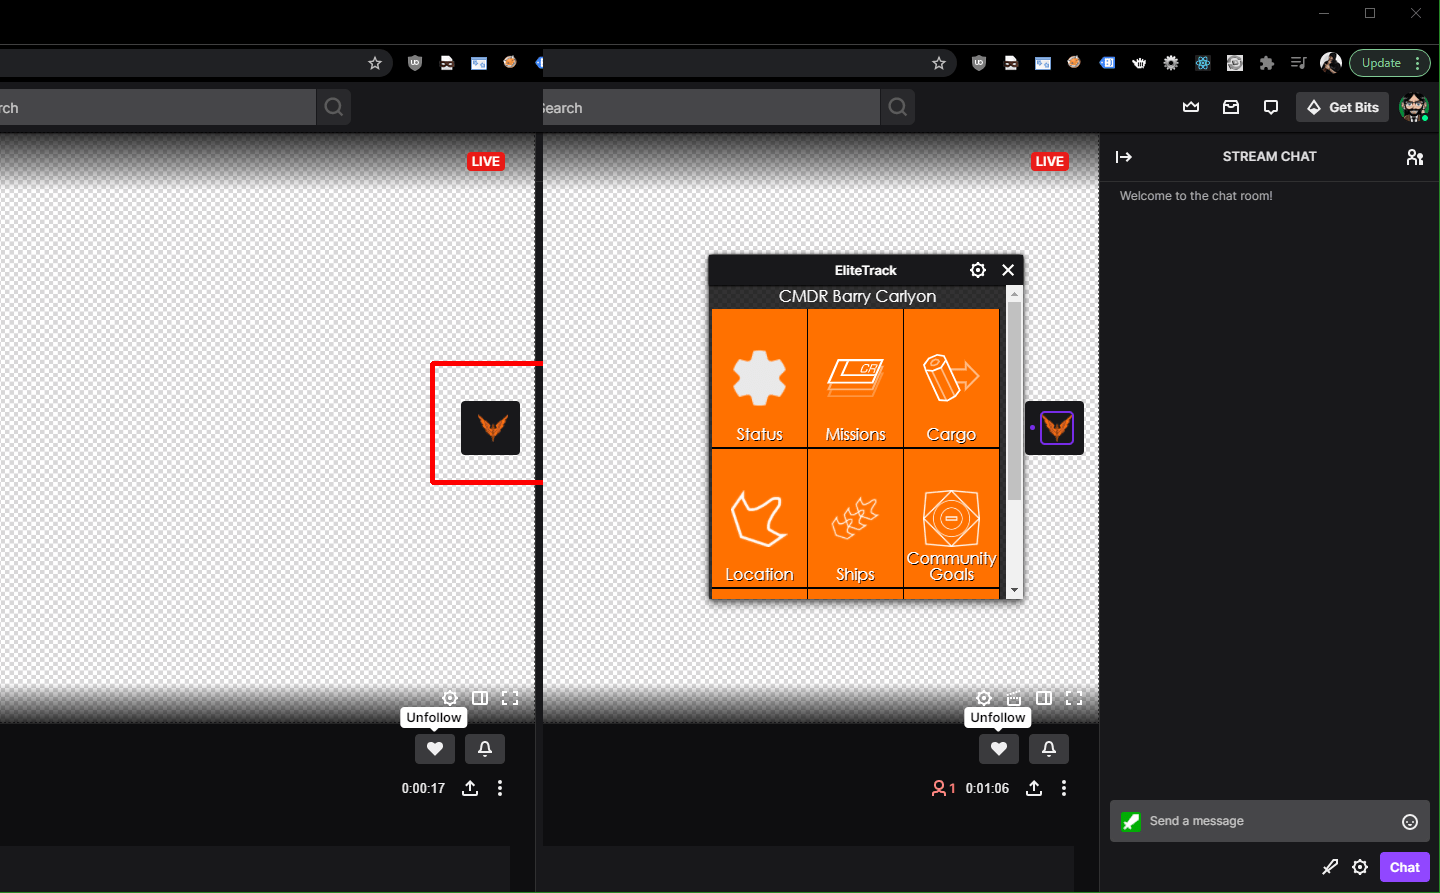
Normally, if you wanted to Test a Video or Component Extension, the channel that you would want to test the Extension on would have to be live and Streaming, the developer rig negates that requirement.

The Developer Rig showing a functioning Video Extension on an Offline Channel. What dark magic is this?

Editors Note: Added/Updated 18th March: In a similar fashion, you can use the the devleoper rig to simulate mobile/tablet views in various Dimensions without having to have the device in front of you. Naturally when it comes to mobile/tablets you should test your extension on devices if possible!

You can use the Developer Rig to mobile test, without having to have a device of the appropraite size handy.
Creating a Mobile view. Common Screensize options!

Further more if you wanted to see what your Extension looks like to people whom are not even logged into Twitch you can’t test that on Twitch itself, since if you are logged out then you are not a valid member of the Allow List.

Typical Creating a view Modal

When creating a view, the rig will ask you which View Type you want to test, and what “feature flags” you want enabled, these feature flags, which we’ll cover in a later post, will let the Twitch Extension JS Helper know what is and is not available. As a short TLDR: lets the extension know if Bits Support is enabled, whether the extension should show the Bits Usage store in the extension or not for example.

The Viewer Types a view can be

It’ll ask you to set the Channel that the extension is “active on”, and ask you to set “who” is accessing the Extension. So you can easily setup any combination of views side by side, which is handy if you want to test what the extension looks like for different users on one page with a easy “Refresh All Views” button.

Three “primary” View Examples side by side. Logged Out, Logged In, Logged In Shared. In this example the extension doesn’t differentiate between Twitch logged out/in, I should fix that…
The Context options.

Finally the Extension View for a given view lets you easily send test context changes to an extension.

This will allow you to test how your extension reacts to subsequent calls to onContext easily.

onContext which we will cover more in a future post, is very powerful when you need you extension to react/respond to various things that could happen during the lifetime of a session of the page loaded. Do you need to resize your extension when the player changes dimensions? Do you need to show/hide your extension in response to the player controls being visible? Are two examples.

What can’t it do?

So we talked about what the Developer Rig can do for you, but since the Developer Rig is completely optional (except for Bits products management), why would you choose not to use it?

The Developer Rig will let you setup a view, and the user for that view, but it does not let you test Viewer State changes.

This would be, for example, a user whom is logged in on Twitch changing from “logged out of your extension” to “logged in to your extension”, commonly referred to as “Sharing your Twitch ID with the extension”. Or you the Developer calling the RequestIdShare function to prompt the user to login, which results in nothing happening in your Extension.

Bits Development can be somewhat difficult in the rig, in the rig you are limited to the loopback function which isn’t very useful for testing, but we’ll cover Bits testing Scenarios in a future post!

Config Service setting from the JS helper can be interesting in the rig, but thats more down to the helper function argument order rather than the rig! Personally I do all my configuration service work from the API, and we’ll cover that in a future post.

Summary

So that is the Developer Rig and what it can and cannot do for you! You can read more about the Rig in the documentation and if you need help you can join us in #developer-rig on the Developer Discord

Next week I’m not sure what we’ll cover. I think we’ll actually start a little building and testing some features, and some ideas on making your own test Rig to host your front end code, in a way that will help you avoid some pitfalls that we’ve covered in this series so far!

BUT MOTHER I CRAVE VIOLENCE

Well, until I write the next part if you want to read more about the Developer Side of Extensions, you can pop a visit over the to the Documentation or take a look at Twitch’s Introductory Page and you can always join us on the “TwitchDev Discord Server”, visit the Developer Support Page for the current invite link!

Why you think you are good enough to even write blog posts on Extensions? I made a one or two of them Extensions of various types.

Twitch Extensions: Part 2 – Integration Points

Welcome to part two of the Twitch Extension Series of Posts.

This week, we’ll be talking a little on Integration Points!

What integration points does a Twitch Extension have?

We touched on this in Part 1

Twitch provides developers with three main, two auxiliary, and two Broadcaster only integration points, and of these integration points Twitch lets us pick the HTML (and thus Javascript or CSS) file(s) we wish to load for all of these. (Well except Panel Popout, screw that guy, it owes me a tenner).

Hang on just a minute

What? OH! You want to know how to create an Extension first or where to set the HTML to be loaded for each view? Yes, that would make a little more sense, wouldn’t it!

Extensions can be created, configured, and release via the Twitch Developer Console.

The Developer console can be found at https://dev.twitch.tv/console

After logging in you’ll generally land on the Summary page that will list you current Extensions, Applications and any Games/Categories you may “own” on Twitch from being part of an organization

An example of the Twitch Developer Dashboard Overview

We’ll ignore everything else since we are only interested in Extensions.

Twitch Developer Console for Extensions

If you click Extensions then “Create Extension” it’ll take you through a short “Setup Wizard” before presenting you with your ClientID for the Extension. We’ll do that now so we have an Extension to play with during this series!

PRO TIP: After starting the Wizard, please finish the wizard, even if you intend to change everything later.

  • Asks for your Extension Name, then Click Continue
  • Asks you to pick the views/integration points you want, which you can change later
  • Provide a Version number, 0.0.1 will suffice for now
  • Add additional details such as the Extension description and contact details for you
  • Now hit “Create Extension Version”

Twitch will send you an email to verify the provided contact details, so click the link in those email(s).

We’ll cover most of the other fields in a future post, but today we are interested in integration points.

Twitch will now have dropped us on the status page for our Extension

It’s important to note that you cannot use “Twitch” in the name of you Extension, and the name needs to be unique across Extensions and Applications across all of Twitch

So Integration Points?

On the Extension Status page, hit “Asset Hosting”, this will take us to the page to configure our “Extension Views” and what html to load. Twitch will prefill with something sensible, but you can use anything you want

"Asset Hosting" section of a Twitch Extension Console
“Asset Hosting” section of a Twitch Extension Console

At the top is the Testing Base URI, we are going to ignore this for now, but we’ll be covering it next week, when we might actually start building.

Below that comes the section that lets you pick via Checkbox, which views (for the viewer) you wish to enable. And the settings for each view.

Panel

A Panel is rendered below the stream, in the panels section, Broadcasters have “some” control over where a panel extension will appear in relation to the other panels, Twitch liks to jumble things round sometimes, but generally Panel Extensions are pretty sticky and reflect the broadcasters choice.

A panel has the following settings available

  • Panel Viewer Path – the path and file name of the HTML file you wish to load, it is a relative path to the Testing Base URI/final upload URL
  • Panel Height – a panel extension is fixed Width (318px), but the developer can choose what height to use, ranging from 100px to 500px

A Panel extension, can be popped out (one of the Auxiliary Integration points we mentioned), which will start at 318px wide and the specified height, but the Viewer can then resize this window. It’s something to be aware of when building your extension, and offers the ability to use Responsive design

Video – Fullscreen

A Video Fullscreen extension will cover the whole stream, so the developer and designer can utilize the whole stream. Usually it’s safe to assume that the size is 1920px x 1080px, and you can scale as needed, we’ll cover some ways to handle this in a future post

A video Fullscreen only has one setting, the HTML file you wish to load, it is a relative path to the Testing Base URI/final upload URL

Mobile

YES, THE CHECKBOXES GO: Panel, Video – Full, Video – Comp, Mobile but the page goes in a different order

The Mobile view is presented to Viewers using a Mobile device in the Twitch App for that device, such as an Apple iPhone, Apple Table, Android phone and so on.

Like Video Fullscreen there is only one option here, the HTML file to load, it is a relative path to the Testing Base URI/final upload URL

Mobile you’ll need to practice Responsive design as dimensions will vary by device and orientation of the device

Video – Component Viewer Path

A video Component roughly works similar to a Panel, but it defaults to being “closed” and can be manually opened by the Viewer by clicking the relevant icon in the “taskbar”, the Taskbar is presented to the viewer on the right of a Live Stream.

The Extensions Taskbar, left is shown a Video Component Extension in the closed state and right is the open state

The following options are available

  • Video Component Viewer Path – the path and file name of the HTML file you wish to load, it is a relative path to the Testing Base URI/final upload URL
  • Video Component Sizing Parameters – there are a number of options here we’ll cover this more in depth at a future post as it can get fun!

Non Viewer integration Points

That covers all the Viewer intergration points and their options in summary

Next we have the “Broadcaster” Integration points, there are two of them, both have the same available settings, the path and file name of the HTML file you wish to load, it is a relative path to the Testing Base URI/final upload URL

Configuration view

This is the main/one off configuration view, when a broadcaster first installs your Extension they will be prompted to ask if they want to visit the Configuration page or not. This page is used for one off or infrequent configuration

The Extension Config prompt during install

In some cases, developers can also block an extension being activated if the configuration has not been done, usually this would be used for things such as providing an API key to access another API, or asking the broadcaster what their Destiny 2/other game Character name is (for example)

The Twitch Extension configuration page for FlightSimTrack
The Twitch Extension configuration page for FlightSimTrack, this example provides additional setup instructions and the API Access Key for the Companion Desktop App

It can be reached from the install flow for an extension and from the “Cog” Icon on an Extension in the Extension Manager section of the Dashboard

In terms of Dimensions it’s usually Landscape but a broadcaster can resize it pretty narrow, so you’ll need to be responsive or provide a minimum width

Live Configuration View

The Live configration view is to be used by the broadcaster for common tasks or things that need to be done during a Stream, examples of this would be to start a Poll for a poll extension, or a “I’m starting a round” in a mini games extension.

The Live configuration view is reached by the Broadcaster from the “Quick Actions” Section of their “Stream Manager”

A Twitch Dashboard Quick Action Button
An example of a Quick Action Extension Button

When clicked, a new window will open, which will contain the Quick Action/Live Configuration View, it’s resizable by the broadcaster so you’ll need to practice responsive design again here

An Opened Quick Action
EliteTrack’s Quick Action view provides easy access to a summary of the data sent, and prompts the user about Bug Reporting

Summary

And that covers the various integration points in a bit more depth compared to last weeks post!

Next week, we’ll be covering “Getting Started Building” I think and why every time I mention a HTML file did I follow it with: “the path and file name of the HTML file you wish to load, it is a relative path to the Testing Base URI/final upload URL”

BUT MOTHER I CRAVE VIOLENCE

Well, until I write the next part if you want to read more about the Developer Side of Extensions, you can pop a visit over the to the Documentation or take a look at Twitch’s Introductory Page and you can always join us on the “TwitchDev Discord Server”, visit the Developer Support Page for the current invite link!

Why you think you are good enough to even write blog posts on Extensions? I made a one or two of them Extensions of various types.